Home > > Operation Guide
1.Connect the V4.4 base station
Connect the 12V power supply or POE power.Connect the LAN port of the PoE power supply to the local network cable, and connect the PoE port to the base station’s network port using a network cable.Once the green light next to the power socket starts flashing, or the green indicator light in the centre of the front of the base station lights up, this indicates that the system has started up.If the network cable is not connected, the third light will not remain light up.
2.Set Up the base station
2.1 Wireless Connection
When the base station is started, it will share a hotspot: eslswifi2, password: 123456789
Connect your computer or mobile phone to the base station’s Wi-Fi: eslswifi2, password 123456789
The base station will assign your computer an IP address in the 10.254.117.x range
2.2 Wired Connection
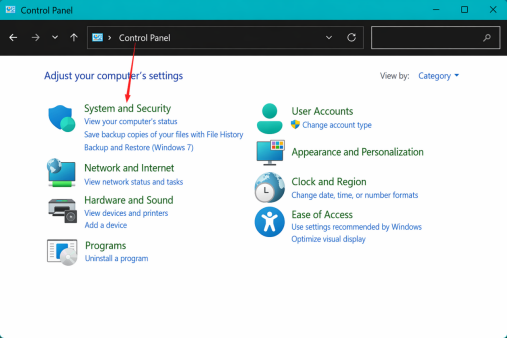
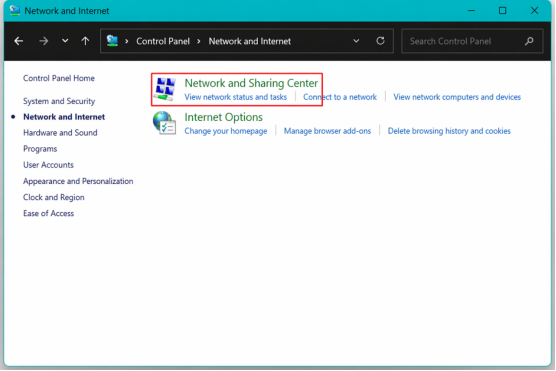
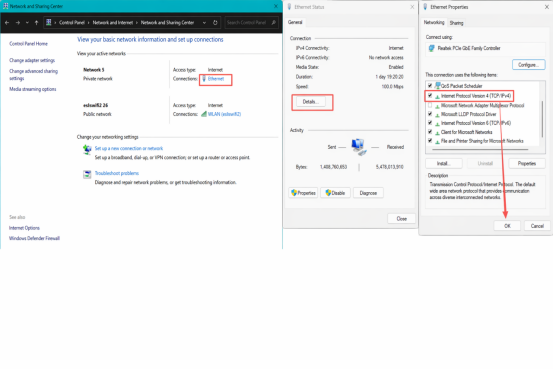
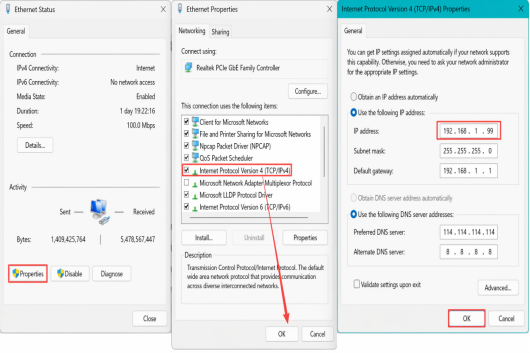
The base station’s default factory IP address is 192.168.1.200. Your computer must be configured to be on the same subnet, 192.168.1.x (for example: 192.168.1.99)
3. Configuration Instructions
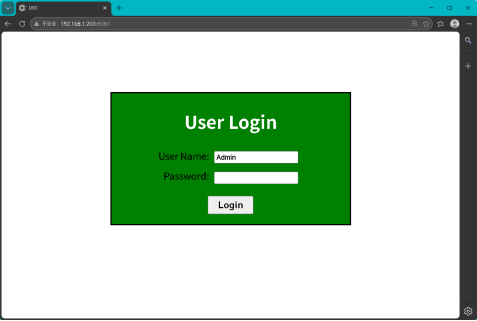
3.1 Accessing the Configuration Page
For wired connections: 192.168.1.200:800
For wireless connections: 10.254.117.1:8080
Username: Admin
Password: 7834
3.2 Base Station Network Configuration
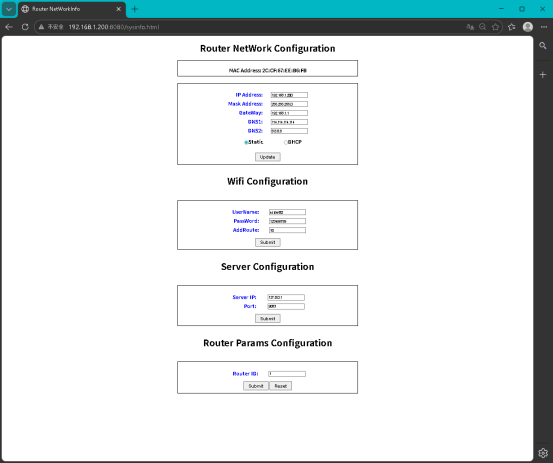
Depending on your local area network (LAN) subnet, you can modify the base station’s IP address to be within the same subnet before connecting it to the LAN; this will allow all devices within the LAN to access the base station via the new IP address.
Assuming the LAN subnet is: 192.168.10.xx
The base station’s IP address should be: 192.168.10.xx (you must assign an unused IP address to avoid conflicts with existing devices)
The gateway should be changed to: 192.168.10.1 (you must verify the specific gateway for your local area network)
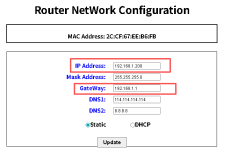 Click ‘Update’ to save; you can ignore the message that appears. The changes will take effect after a restart.
3.3 Wi-Fi Configuration
You can modify the Wi-Fi hotspot settings.
The ‘AddRouter’ setting specifies the Wi-Fi channel, with values ranging from 1 to 13.
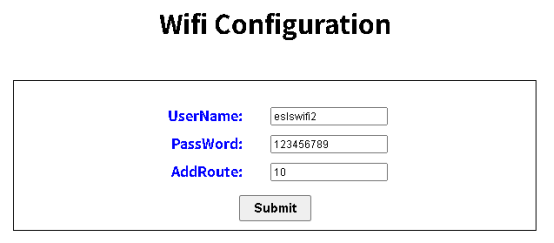
Click ‘Submit’ to save the configuration; you can ignore any messages that appear. The changes will take effect once the base station has been restarted.
3.4 Server Configuration
By default, the base station connects to its own built-in service, so the IP address is fixed at 127.0.0.1;
The base station connects to the electronic tag service on port 9083.
If you need to connect to a specific electronic tag service, you can change the `serverip` to the IP address of that service.

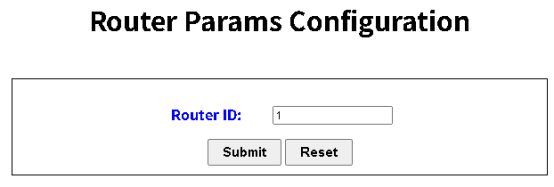
3.5 Base Station Parameter Configuration
The default RouterID for V1.4 base stations is 1; this does not need to be changed.
If a V1.4 base station is configured to connect to other electronic tag services, modify this as required to ensure that all base station IDs within the system are unique.
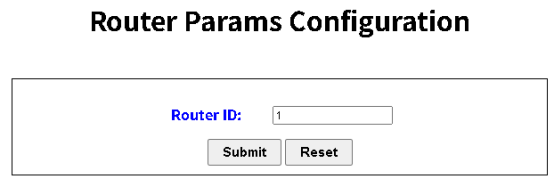
3.6 Base Station Parameter Configuration
The default RouterID for base stations is 1; no modification is required.
If a base station configured in section 1.4 is connected to other electronic tag services, modify this as required to ensure that all base station IDs within the system are unique.
3.7 Reset the Base Station
Click the Reset button, or restart the base station’s power supply.
3.8 Restore Factory Settings
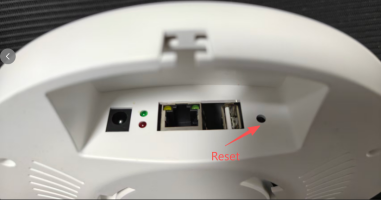
Press and hold the reset button for at least 10 seconds, then release it; do not keep holding it down. Once the factory reset is complete, the base station will beep a few times and then restart automatically. The IP address will revert to the default: 192.168.1.200.
3.9 Check and View MAC address
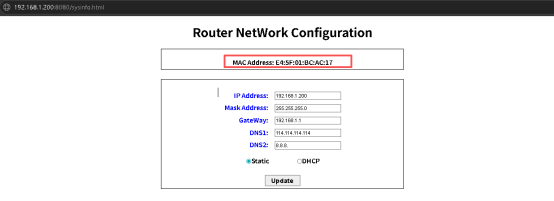
4. Accessing the System Management Backend
Access via a wired connection:http://192.168.1.200/esls
Access via a wireless connection:http://10.254.117.1/esls
Login details:
Username: admin
Password: 123456

 EN
EN
 FR
FR
 JA
JA
 RU
RU
 ES
ES