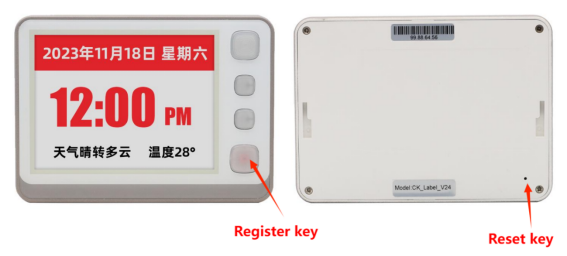
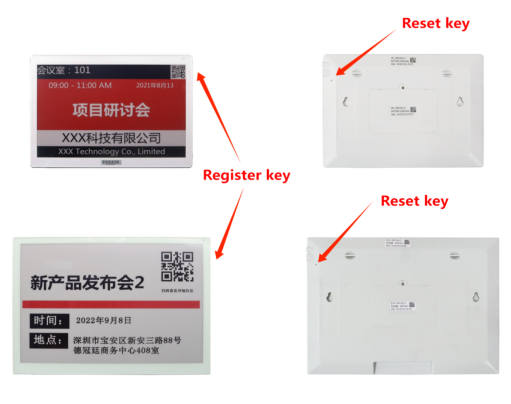
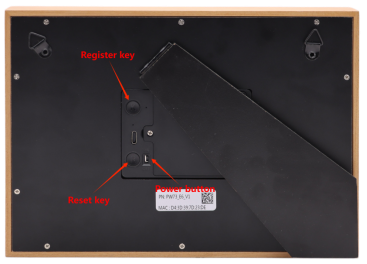
Long press the K key, the green light, and then press the R key, wait for the green light flash, you can release the button, the green light flash slowly, the device can enter the configuration Register mode.
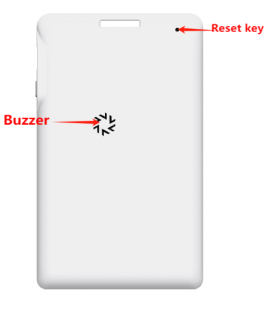
Long press the button still, the green light, the pin under the back hole, wait for the green flash, you can release the button, the blue light flashes slowly, the device can enter the configuration registration mode.
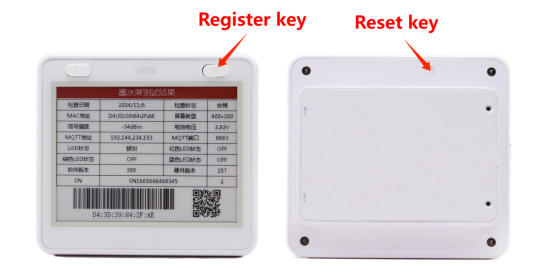
Long press the right button, the green light, then press the back Reset button, wait for the green flash, you can release the button, the blue light flash slowly, the device can enter the configuration Register mode.
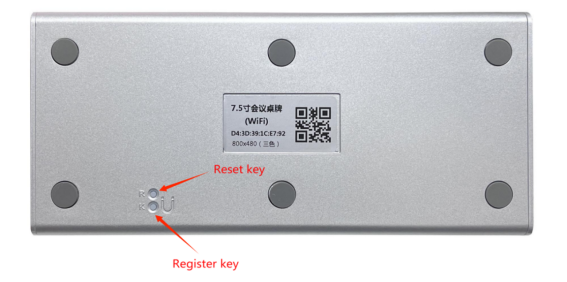
Long press the button still, the green light, the pin under the back hole, wait for the green flash, you can release the button, the blue light flashes slowly, the device can enter the configuration Register mode.
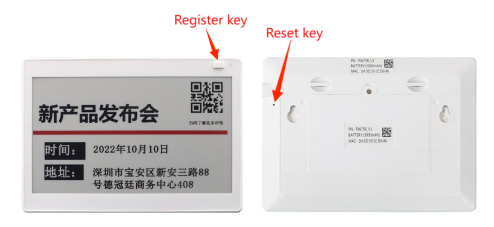
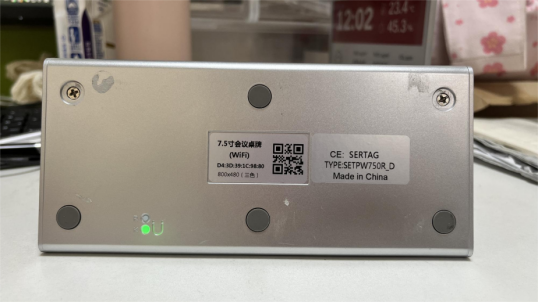
7.5-inch WiFi label (Key: Register key, Back hole: Reset key)
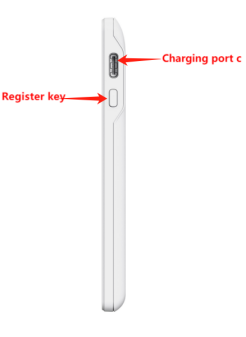
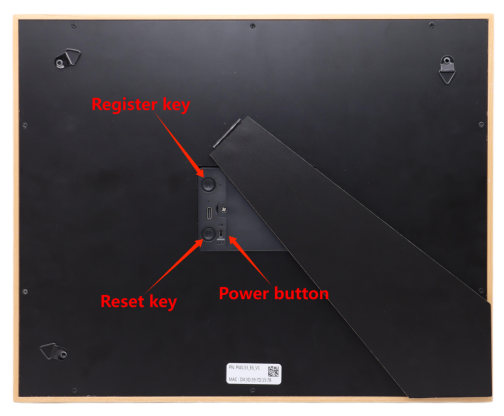
Long press the button still, the green light, the pin under the back hole, wait for the green flash, you can release the button, the blue light flashes slowly, the device can enter the configuration Register mode.
10.2-inch / 13.3-inch WiFi label(Side key: Register key, Small hole in the back: Reset key)
Long press the button still, the green light, the pin under the back hole, wait for the green flash, you can release the button, the blue light flashes slowly, the device can enter the configuration Register mode.
First, press the key. Then, hold down the K key for a long time. The green light will remain on. Press the R key again. After the green light flashes quickly, you can release the key. The green light will flash slowly and the device will enter the configuration registration mode.
3.The WiFi tag registration
3.1 Enter the parameter configuration mode
Long press the button still, the green light, the pin under the back hole, wait for the green flash, you can release the button, the blue light flashes slowly, the device can enter the configuration registration mode.
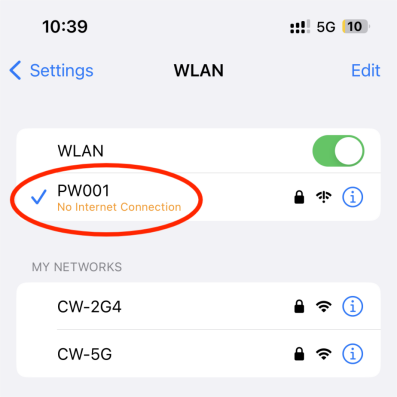
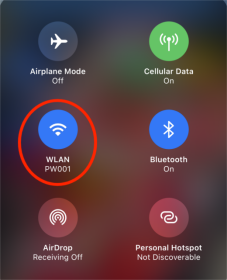
Open the wireless area network and connect the labeled WiFi "PW 001";
3.2 Configuration method guide
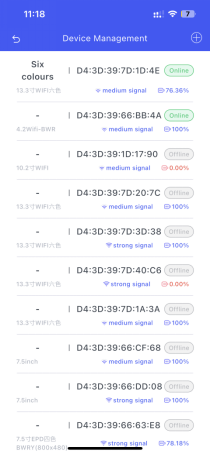
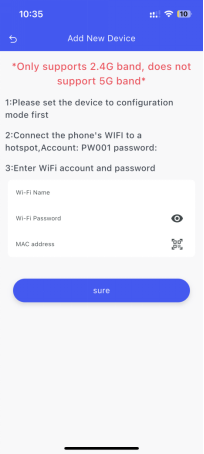
Log in to the APP and enter the "Device Management" page of the personal center, and click at the "+" button in the upper right corner of the interface to add a new device.
Note: Refresh failed or too slow can click on the mobile phone WiFi "PW001", to connect to this hotspot to configure.
4.APP operation manual
4.1 Equipment screen projection operation guide
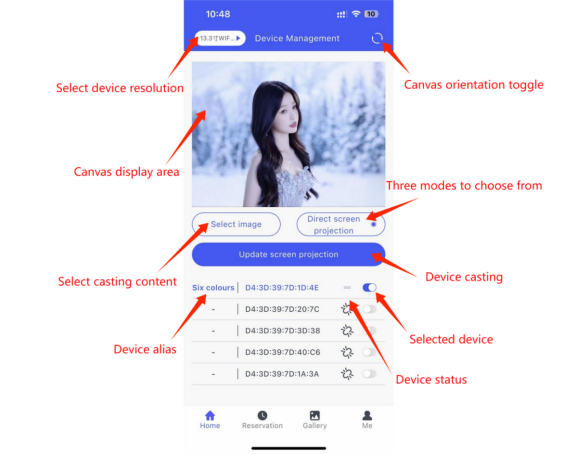
Visit the device management page: Go to the home page and find the upper left corner of the page, see an option menu "Screen Resolution", and select the corresponding display resolution for the device.
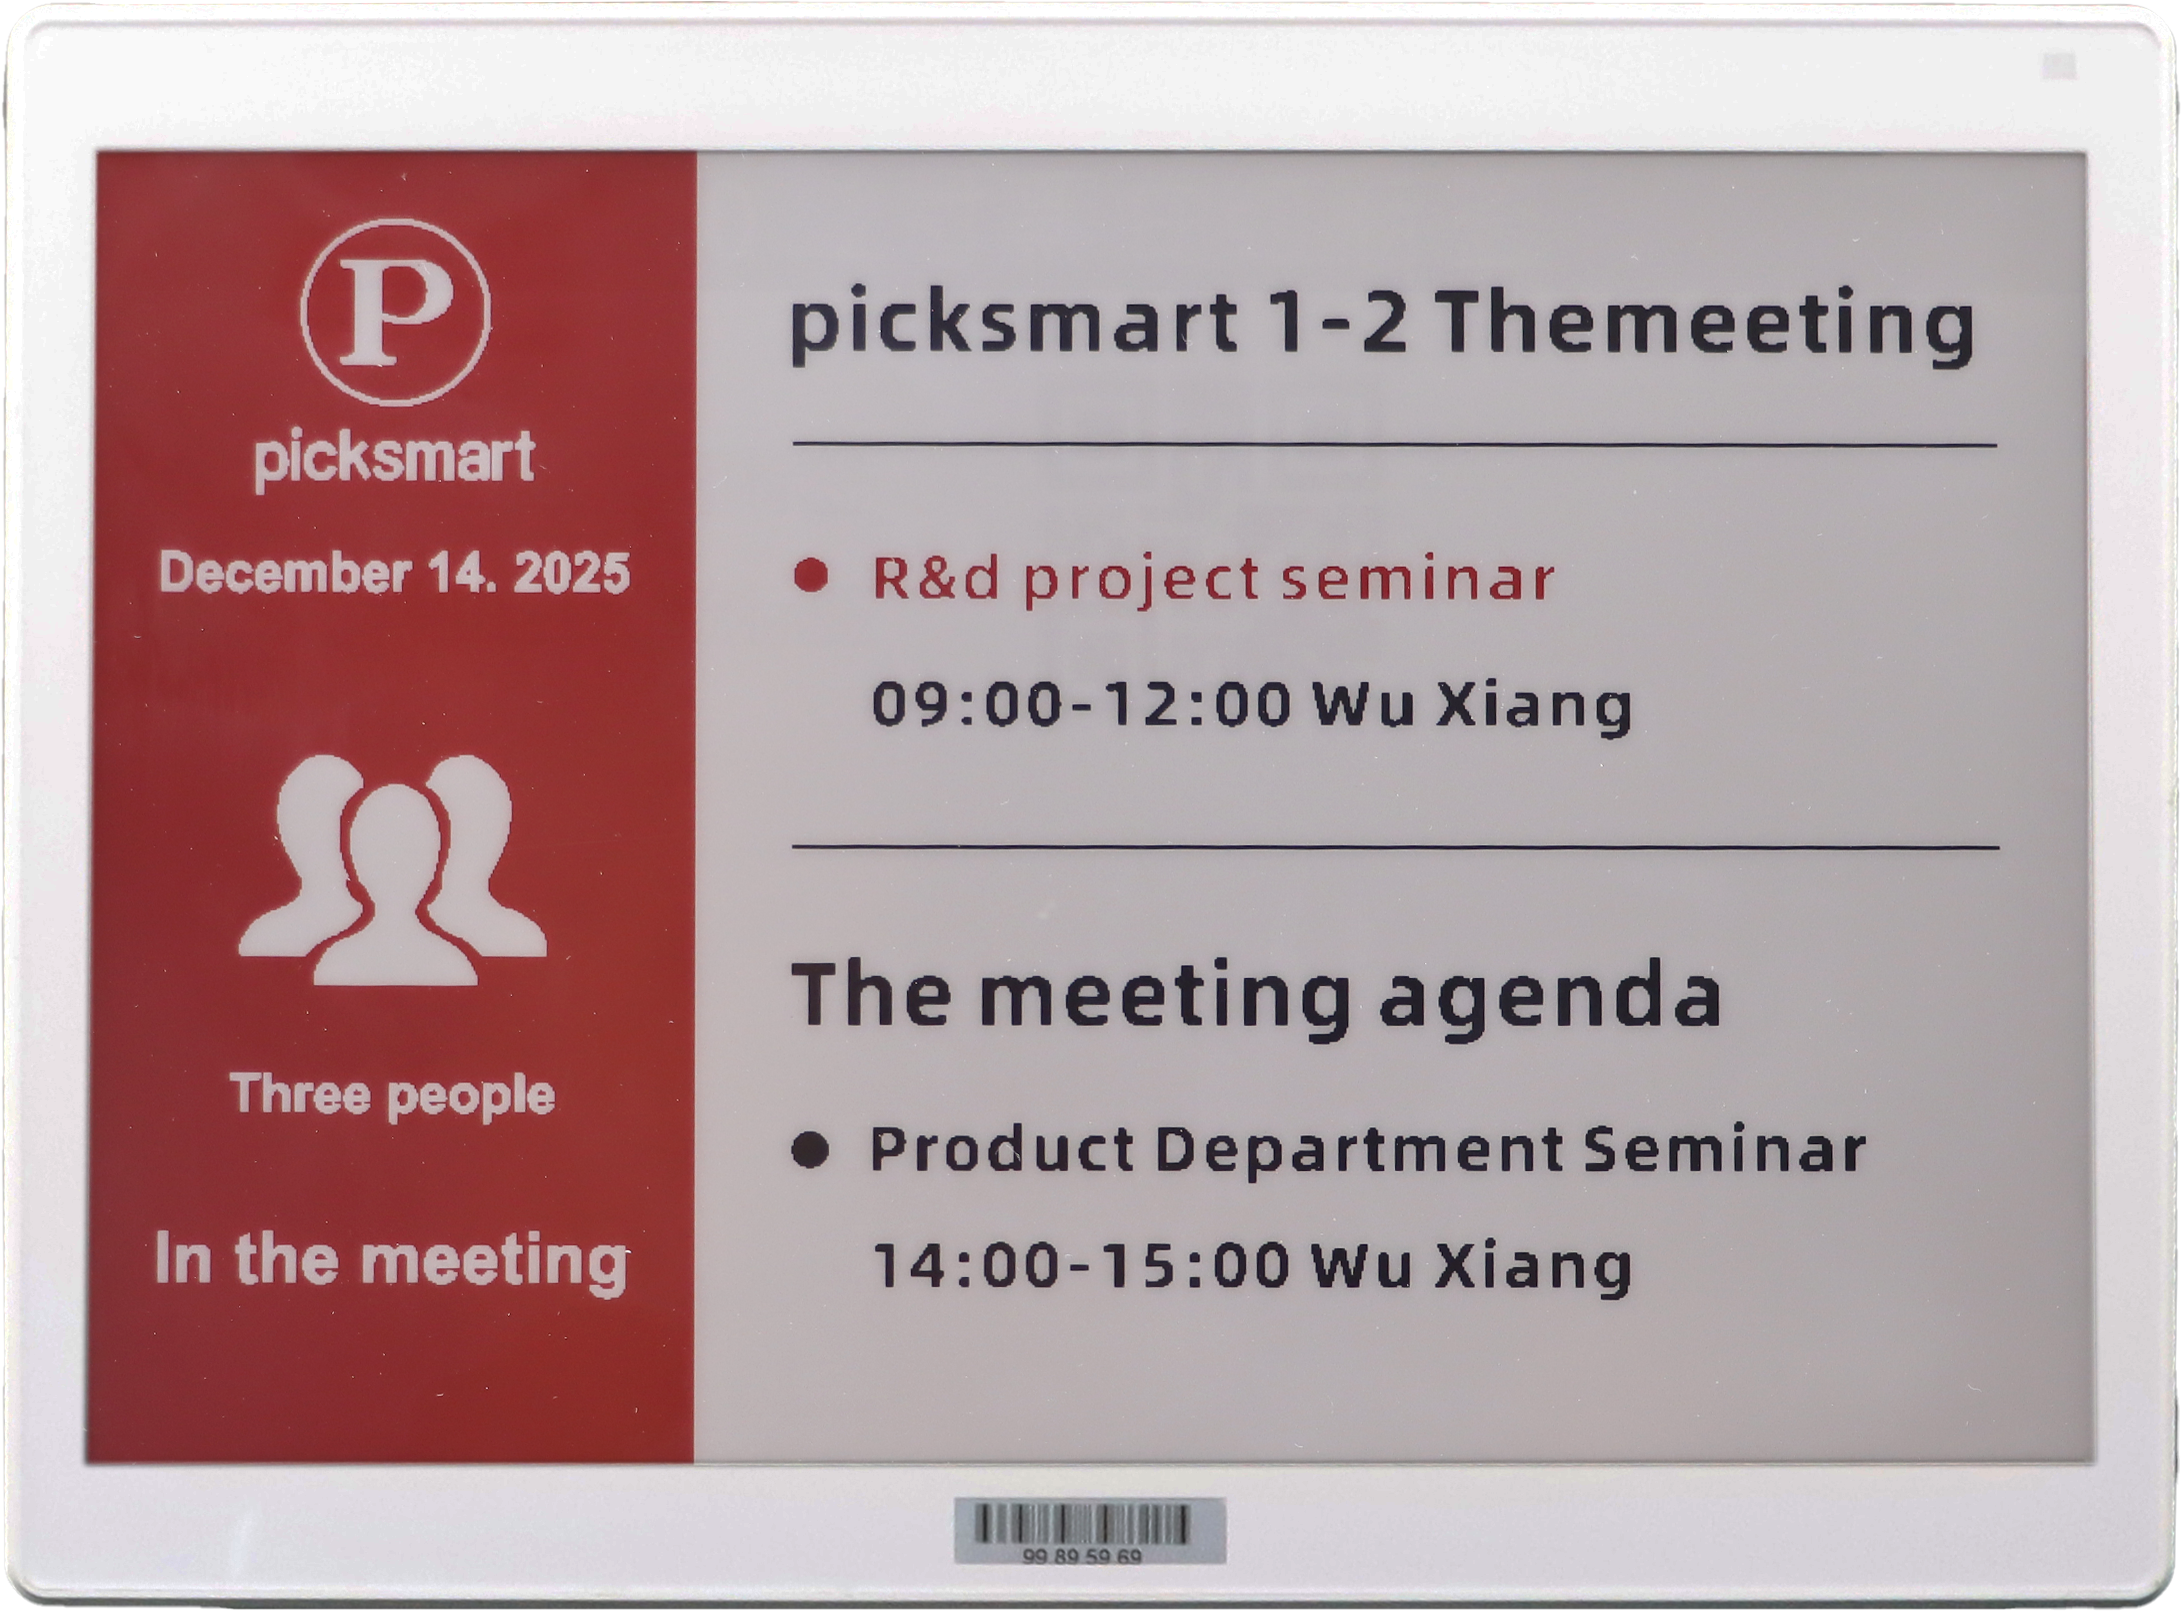
Picture editing and screen casting preparation: Click the "Select a picture" button to select a picture from the photo album, take a picture and make a template. Use the built-in editing tool to make the necessary cutting, color adjustment or adding text. After processing, select Direct Screen projection mode to wirelessly transfer the edited image to the target device.
Select the device and screen casting update: During the screen casting process, select the MAC tag of the target device. The MAC tag is the ID code of the device used to ensure the accuracy and security of the screen. After being selected, click the "Screen Update" button, and the picture will be immediately updated and displayed on the target device.
4.2 Operation guide for appointment management
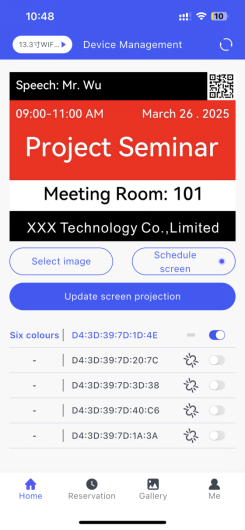
Select resolution and upload display content: select the corresponding display resolution for the device according to the screen resolution of the device. Click the "Select Picture" button to select and upload the display content or information required for the album or from the template.
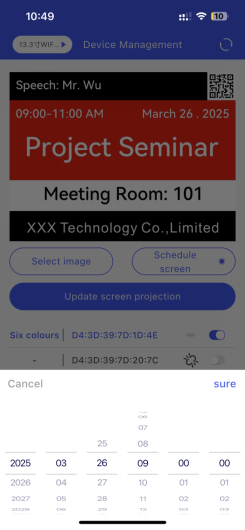
Select mode and setting time: after processing, select "reservation screen" mode. Click "Screen Update" to pop up the start time setting window. Choose the appropriate start time according to the schedule of the meeting or event.
Confirm reservation: After confirming that all Settings are correct, click the "confirm" button to complete the reservation. At this point, the appointment information of the device will be saved in the system, waiting for the automatic execution.
4.3 View and appointment management
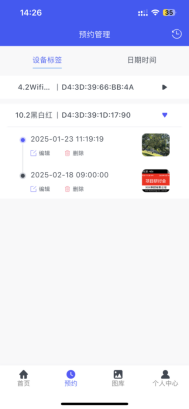
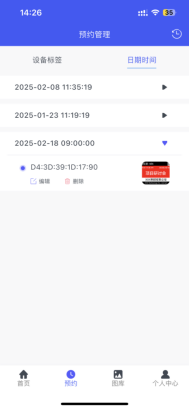
View reservation content and time: In the "Appointment" interface, you can view the booked equipment, reservation content and time. Keep abreast of the screen arrangement of meetings or events.
Manage the device tag: Each device tag can view the appointment content and time of the device by clicking on the tag. If you need a new appointment time, click the "Edit" button to reset the new appointment time. If an appointment is not required, click the "Delete" button to delete it. Click on the image to enlarge the preview for a clearer view of the projection content.
View the reservation content for the date Time Period: In the Date Time section, you can view the content information of the device label reservation for each time period. Understand the screen projection arrangement during the whole time period to avoid time conflicts.
View reservation history: There is a "reservation history" interface in the upper right corner of the page, where you can view past projection records. Help to review and analysis of previous meeting or activity effects.
4.4 Operation guide for the gallery management
Create Library: Click the "Create Library" button in the upper right corner of the interface to start the gallery creation process. Select the screen type for the device and enter an easily identified name for the new gallery. Quickly find the required content in the subsequent gallery management.
Upload pictures or content: Click "Select pictures" on the home page, and you can select the existing pictures from the album, or upload new display content or information by taking photos or making templates. Please make sure that the uploaded content matches the device's screen resolution.
Select mode and storage: After processing pictures or content, select "Save in Library" mode, click "Screen update" button, the system will pop up the just created gallery list, select the updated gallery, and click confirm. New pictures or content are successfully stored in the selected gallery.
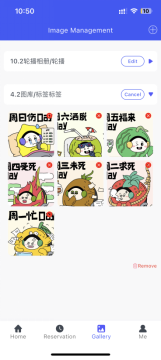
Manage gallery content: View and manage created galleries in the Gallery interface. If you need to add more pictures, just repeat the upload step above. If an image is not required, click on the red "X" mark in the upper right corner of the image to delete it. If the entire image gallery is not needed, click the "Delete" button to remove it completely.
4.5 Operation guide for rotation tasks
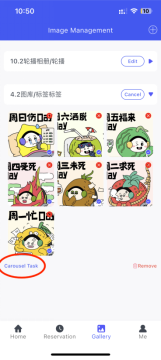
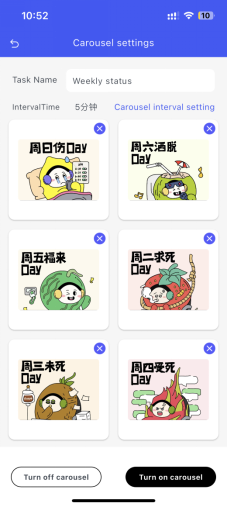
Library setting rotation task: in the gallery interface, click the "Edit" button, select two or more pictures from the picture list to check. After completing the picture selection, the "rotation task" button appears in the lower left corner, and click to enter the relevant setting interface.
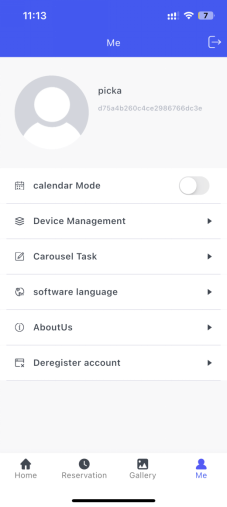
Manage rotation tasks: After entering the personal center, click the "Wheel Task" option to view and manage all the rotation tasks created. Here, you can renaming the task, flexibly set the interval of rotation images, delete any image in the task, or turn off the whole frame rotation function at any time.


 EN
EN
 FR
FR
 JA
JA
 RU
RU
 ES
ES